Starting Global Configurator

To start Global Configurator:

  1. Double-click the GC shortcut icon on your desktop (placed there during installation of GC).  The Global Configurator main screen and Start Options dialog box open.

Note:  If you downloaded Global Configurator from the Extron website and the shortcut icon is not present on the desktop, the following will start Global Configurator:

From the desktop, click the
Start button and select All Programs > Extron Electronics > GCx.x.

  1. Select Create a New Project.

  2. Click OK.  The Project Settings dialog box opens.

  1. In the Next Assigned IP Address field, enter the IP address of your first network device.

  2. Click OK.  The Add Device dialog box opens.

  1. From the IP Link Device drop-down list, select the device type.

  2. In the Display Name field, enter a unique display name (for example, enter CR1: System 5 IP).

  1. In the GlobalViewer® Tree section, click the New Location icon.  A location folder is added to the tree with a label that can be edited.

  2. Enter a unique name for the location folder (for example, enter Conference Room 1).

  1. Select the Make this device a GlobalViewer® Host check box if desired.

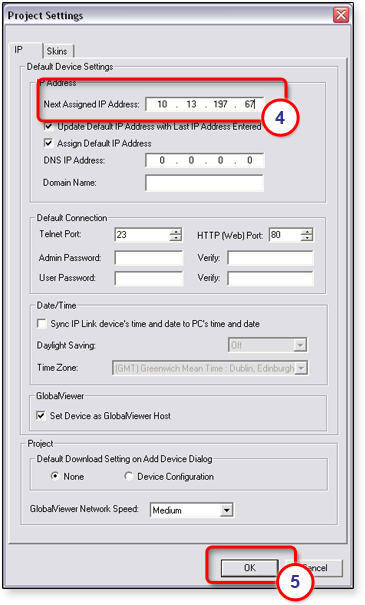
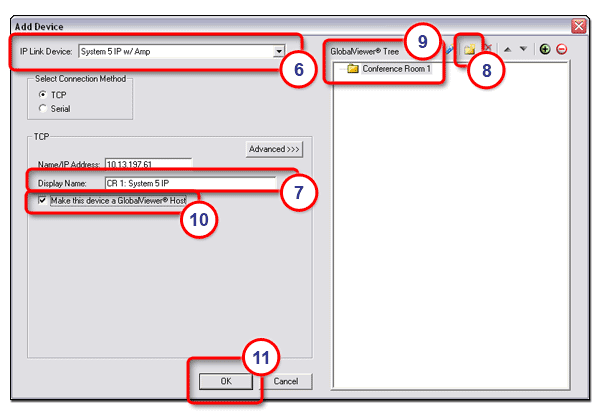
Note:  A GlobalViewer host is a device that launches the GlobalViewer application if its IP address is accessed in an Internet browser.  A device that is not designated as a GlobalViewer host can be monitored and controlled from any GlobalViewer host device on the same network.

  1. Click OK.

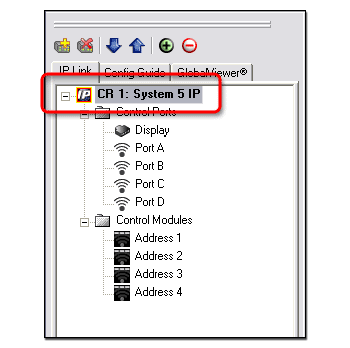
The Global Configurator project opens and displays the first network device in the
IP Link Tree window (shown at right).

To view the new device in the Device Locations section (see below):

  1. Click the GlobalViewer tab at the top of the IP Link Tree window.  The new location and device are displayed in the Device Locations tree (2).

To save the new Global Configurator project file:

  1. From the File menu, select Save.  The Save As dialog box opens (shown at right).

  1. In the File name field, enter a unique project name.

  2. Browse to the location where the project is to be saved.

  3. Click Save.